We’ve created this toe clip pedals one-stop resource to help you better understand:
- what toe clip pedals are
- whether they are right for you
- what are the different options
and everything in between.
Quick Links to Sections
How to Use Toe Clip Pedals
How Do You Fix a Toe Clip on a Pedal?
Do Toe Clip Pedals Make a Difference?
Should I Use Toe Clip Pedals on a Mountain Bike? (And what about Trekking?)
Toe Clip Pedal Examples—Models in Use Today
WHAT IS A TOE CLIP PEDAL?
The best way to understand toe clips is by taking a look at pedal design history.
Toe clip pedals are simply a “cage” attached to the front of a flat pedal. But the toe clip design is much more suitable for some uses compared to others, indoor cycling vs downhill mountain biking for example.
From No Pedals to Flat Pedals
The precursor to the modern bicycle didn’t have a crank, so it also lacked pedals. You propelled Karl Drais’s 1814 Running Machine,Velocipede, or Hobbyhorse as it was also known, by straddling the saddle, and pushing with your feet against the ground.
With the 1867 appearance of Pierre Michaux’s “pedal velocipede”, later known as the Ordinary , or popularly as the Penny Farthing , simple pedals attached to the front wheel crank were, literally, the way forward.
The Penny Farthings could be dangerous though—(you might enjoy Banjo Patterson’s hilarious Mulga Bill’s Bicycle poem on the catastrophic possibilities).
Pedal development was minor; wooden supports were added to what was a simple rotating peg, which later evolved into the one-piece cage that endured for decades.
The modern bicycle—the Rover—with two equal-sized wheels and a rear chain drive was introduced in 1884. Several decades passed before the the first toe clip innovations appeared.
Flat to Toe Clips
Flat or platform pedals were the default; toe-clip—or toe-cage—pedals first appeared in the early 20th century to ensure shoes did not slip off pedals.
An important contributing factor, though, was from bike racers looking for more efficient pedaling action. Small energy savings compounded over a long distance mean the world in the final stages of a race. More on the mechanics of this below.
Toe clips were attached, or “clipped”into the front of a pedal. Well, attach is the right term. The clip frame was actually bolted onto a pedal.
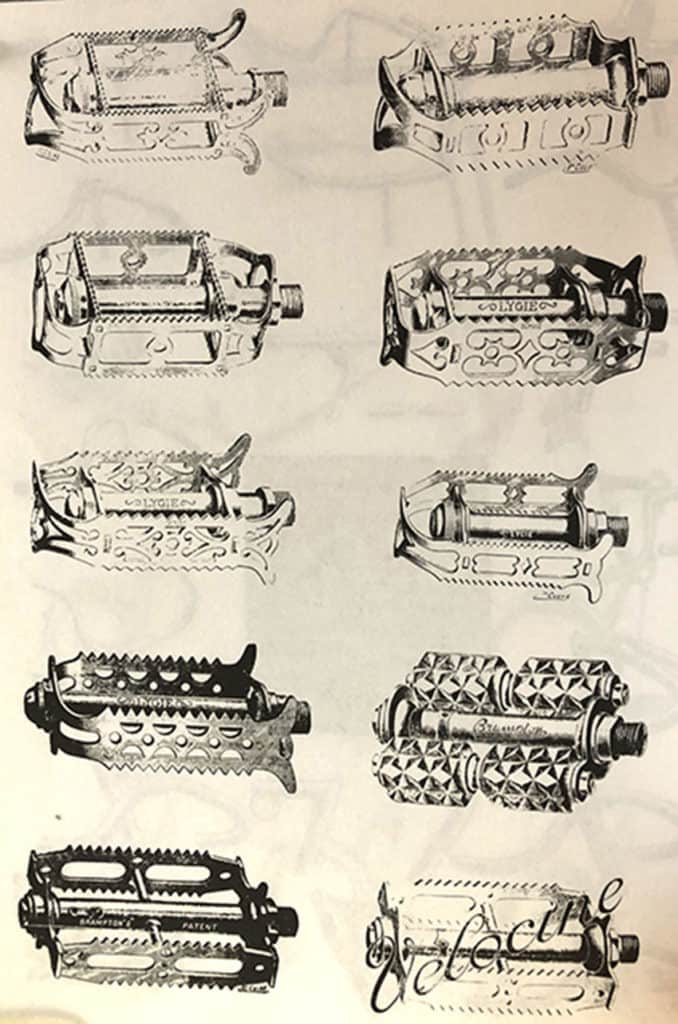
Here’s one of the several hundred drawings of a wide variety of bicycle components through the years by bicycle enthusiast, Mr. Noguchi, of the Joto Rinyo Co.
These pedals are from c.1911 (how little things have changed over the years) and it was not long before toe clip cages were added to the front of the pedal platforms. The main difference is that the bolts face the opposite direction; not such a good look, but it makes the nuts a little easier to adjust.
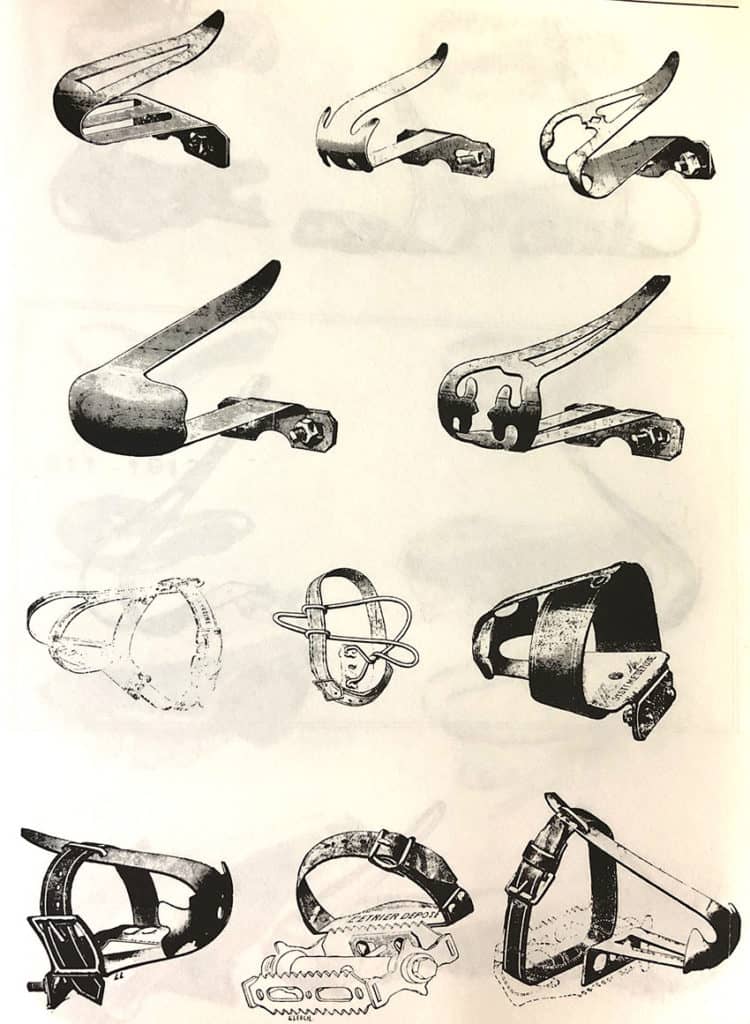
Again, not much has changed, although you’ll not see any around remotely resembling the 3rd row down middle design.
The first toe clip pedals were bolted into the front of the pedal, with the cage curving around the toe. Without a bike pedal strap, your foot would be likely to slip out if you are not pushing forward enough.
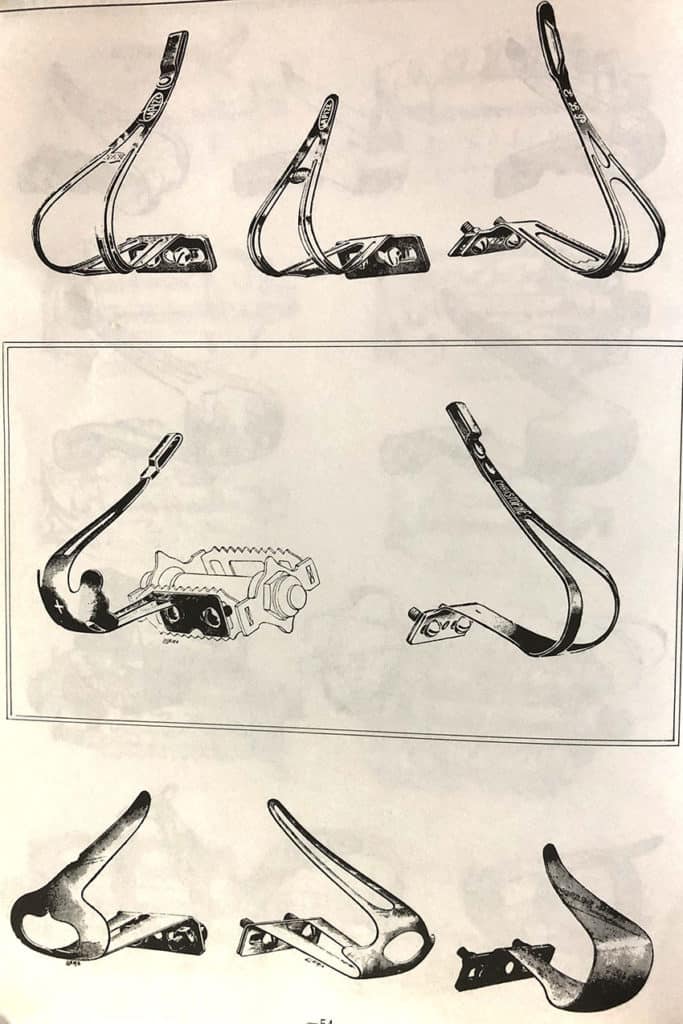
These from a quarter-century later with the twin struts of the cage and the bracket for threading the strap are pretty much the design around today, including bolt direction with nuts in the rear.
Modern Toe Clip Pedals
Toe clips now sport twin bands of steel or nylon (if you are looking to economize). An encircling strap holds the rider’s foot within the cage.
There is no “clipping” anywhere however. Ironically, the advance in pedal design that followed the toe clip innovation many decades later, the clipless pedal, does have a clip mechanism.
HOW DO YOU USE TOE CLIP PEDALS?
As we’ve seen, toe clip pedals don’t actually clip to anything—anywhere. The clip, or cage as it’s commonly known, bolts onto the pedal body.
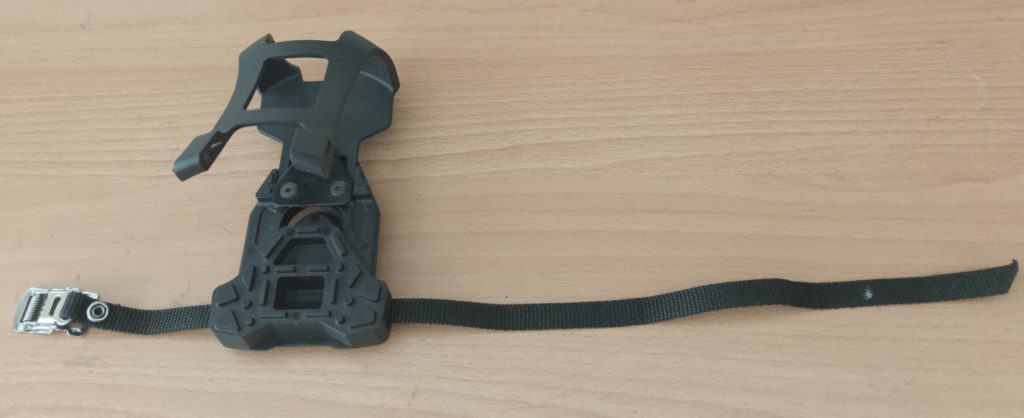
The strap slides through the pedal’s base then up through the top.
A rider slides her foot into the pedal cage. The function of the strap is to square the foot in the cage and stop it from sliding sideways, at the very least.
Tightening the strap encircling the pedal body’s rear around the shoe also ensures a rider is unlikely to inadvertently pull their shoe out of the toe clip on the upstroke. But there’s also another advantage . . .
The Physiology of Toe Clip Pedals
With a flat pedal, you can only apply energy from the top of the pedal cycle to the bottom by pushing directly onto the pedal platform.
Significant efficiency gains come from taking advantage of the upstroke on the way back to the top, which is otherwise completely wasted; a rider gets increased mechanical efficiency by pulling during the upstroke.
Bracing a foot against the toe-clip produces drive, but the strap binding your foot to the pedal platform is equally important. A strap pulled snugly, without being overly tight around your foot, in concert with the toe clip, ensures you concentrate more of your energy into forward motion.
The straps are mostly manufactured out of braided nylon threads. It’s strong, and durable enough to hold your foot in place, even though the stress is not much since the toe clip cage or frame absorbs most stress. You’ll most probably never have to replace it at any rate.
More stylish straps made from leather, rather than nylon, are common where look is important, such as on a fixed gear bike for example.
The strap threads through the cage’s base, then around into the toe clip frame at the top. The circle completes with the loose end secured into the strap clasp.
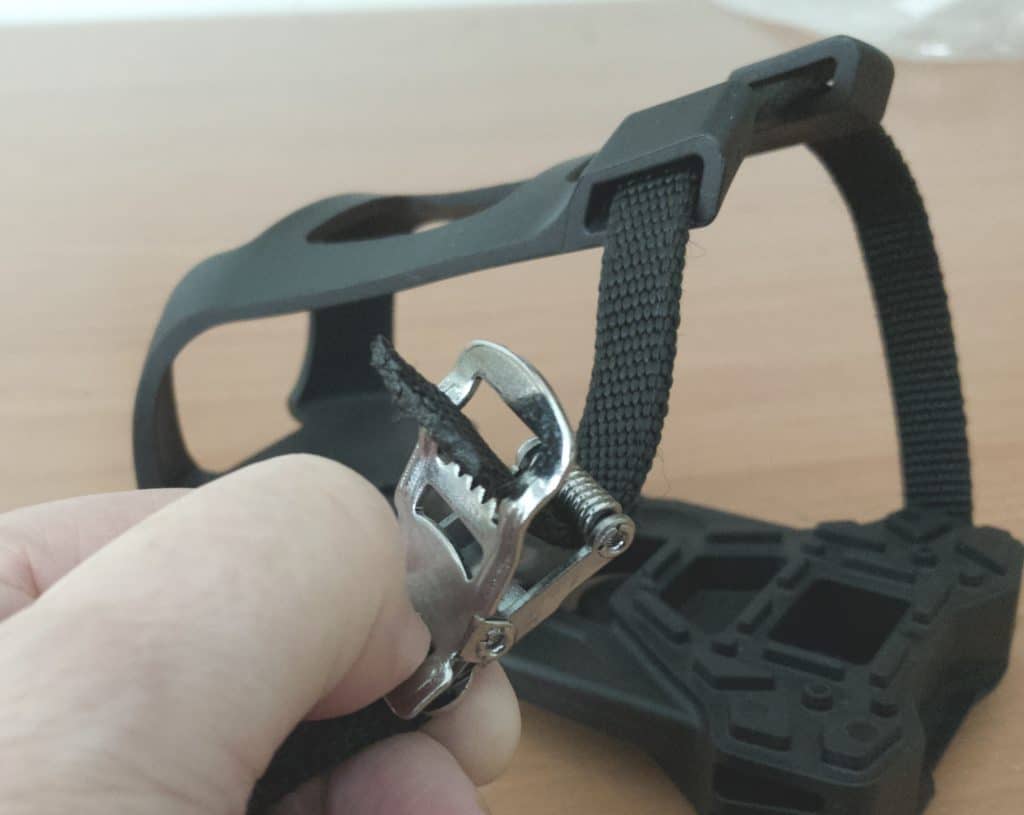
The stainless steel spring-loaded clasp clamps firmly onto the nylon strap. A moderate degree of pressure releases the clasp.
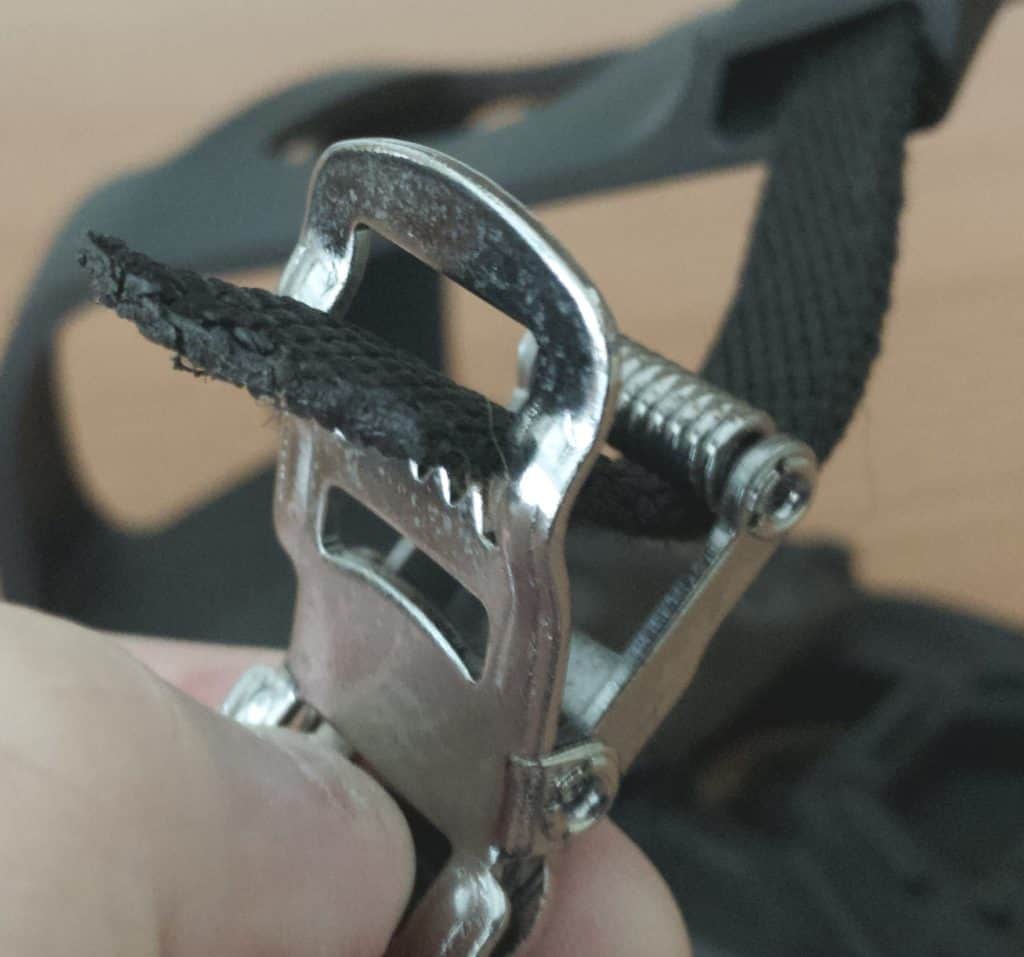
You feed the strap through the clasp from behind, up at an angle across the teeth. Releasing the clasp pinches the strap firmly preventing slippage, but not so tight that the teeth penetrate the strap’s nylon weave. The potential for rapid wear from foot movement and teeth on strap is eliminated with this setup.
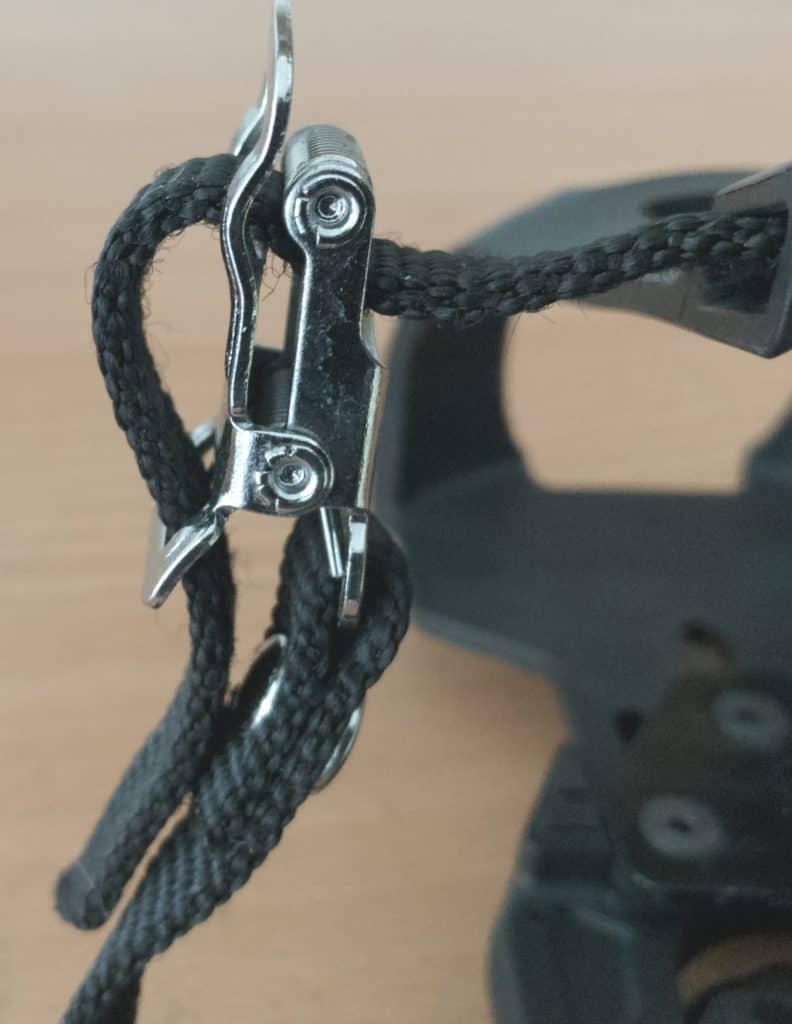
The loose end of the strap is fed through the buckle, nestling against the rest of the strap.
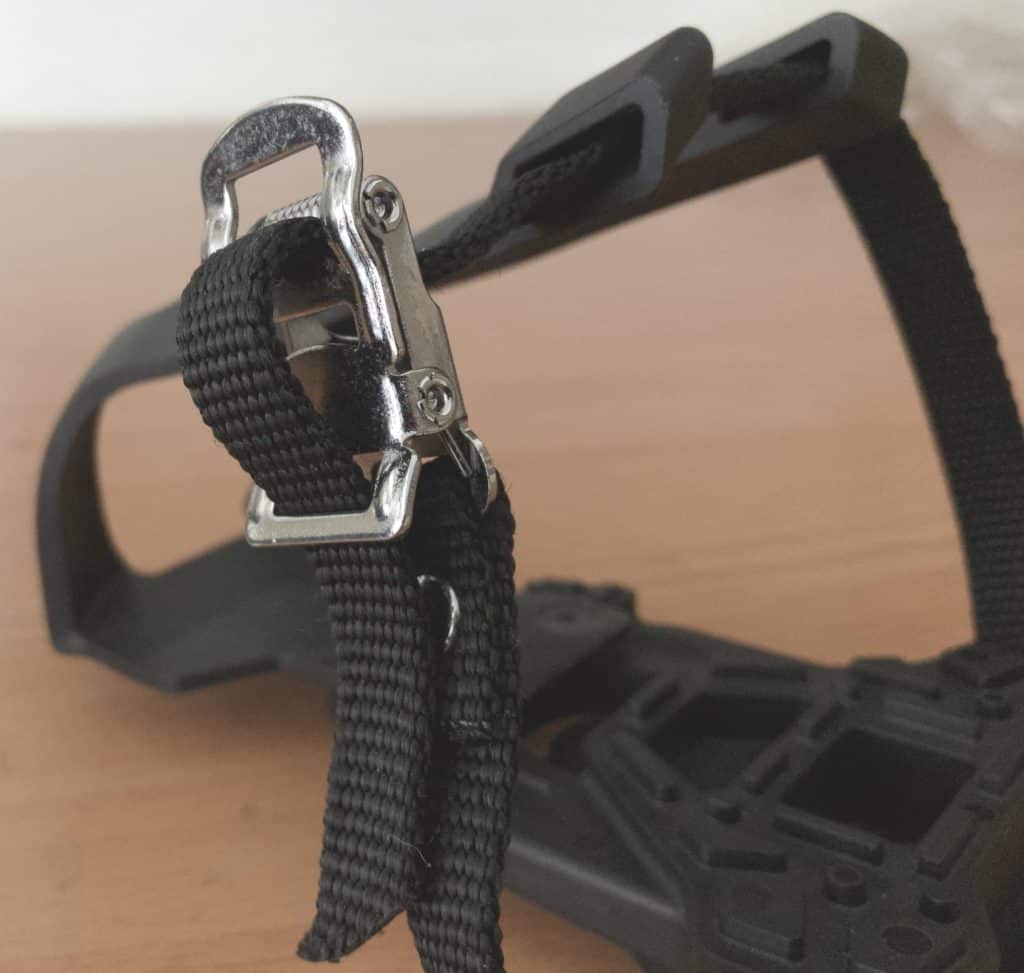
Release by pulling the strap out of the buckle, pressing the clamp open, then feeding the strap through until you’ve cleared a space around your shoe. No need to pull the strap completely out of the buckle of course.
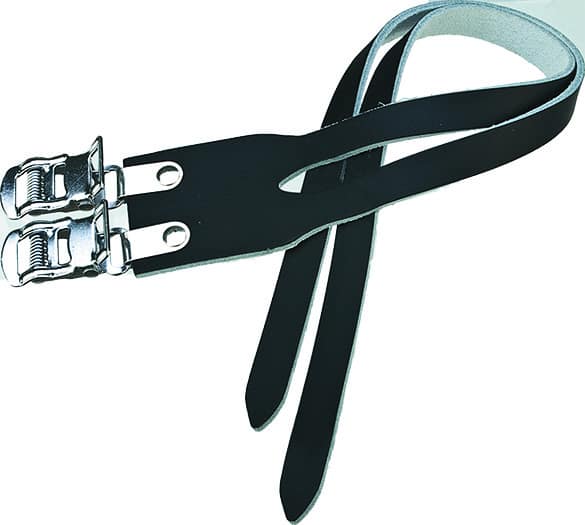
At SCADA we make toe clip pedals to order for brands. One variation sports twin buckles that clamp down with a little less force, and providing a classier look for city bike or fixie riding.
Getting Your Foot into the Toe Cage
Being able to very finely adjust strap length makes it easy to get your foot in position.
Open the clasp and pull the strap. Once it’s loose enough with a wide enough space for your foot; slide your foot through to touch the toe-end of the cage.
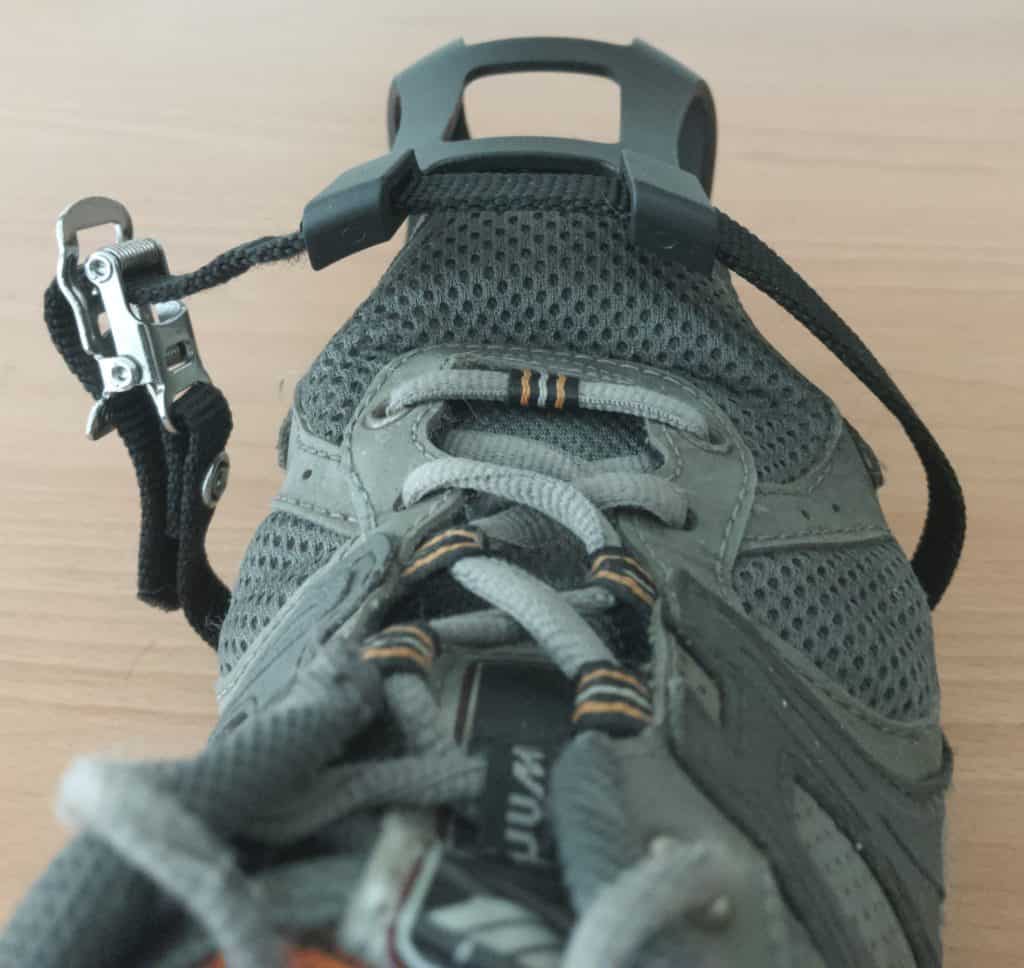
There’s enough space to fit any size or shape of shoe. Well, don’t go wearing boots. But any sports shoe is going to fit in there.
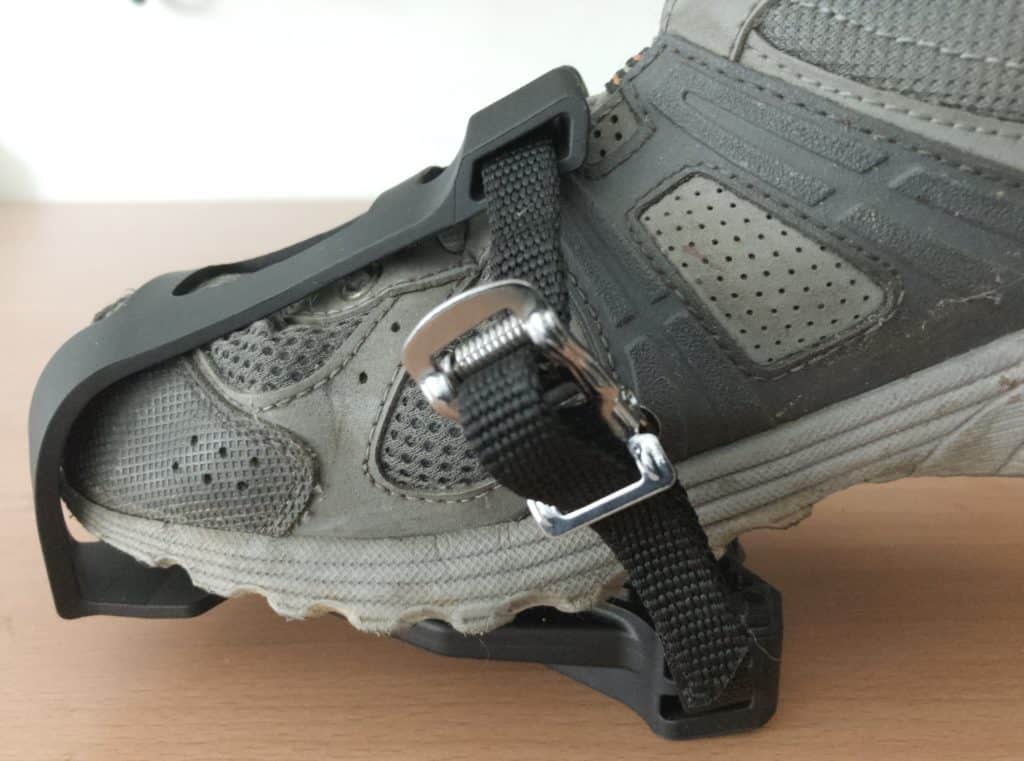
The safe way to get your foot into a toe clip pedal is sit on the saddle supporting yourself with one foot on the ground. Slide your foot into the cage all the way to the end. As long as you’re not wearing boots, you’ll find it easy.
Press on the clasp to open it then pull the strap through until it is comfortably snug around your foot. A little tighter is better than a little looser. Minimally make sure your foot won’t pull free of the toe clip cage when you are on the return stroke to the top of your pedal cycle ready to push forward and down again.
And this is where you can really appreciate the advantage of a toe clip pedal compared to a flat pedal.
Your foot’s firm attachment to the pedal allows you to put energy into the upstroke. Transferring exertion from the downstroke to the upstroke better balances your energy flow. You’ll feel the difference.
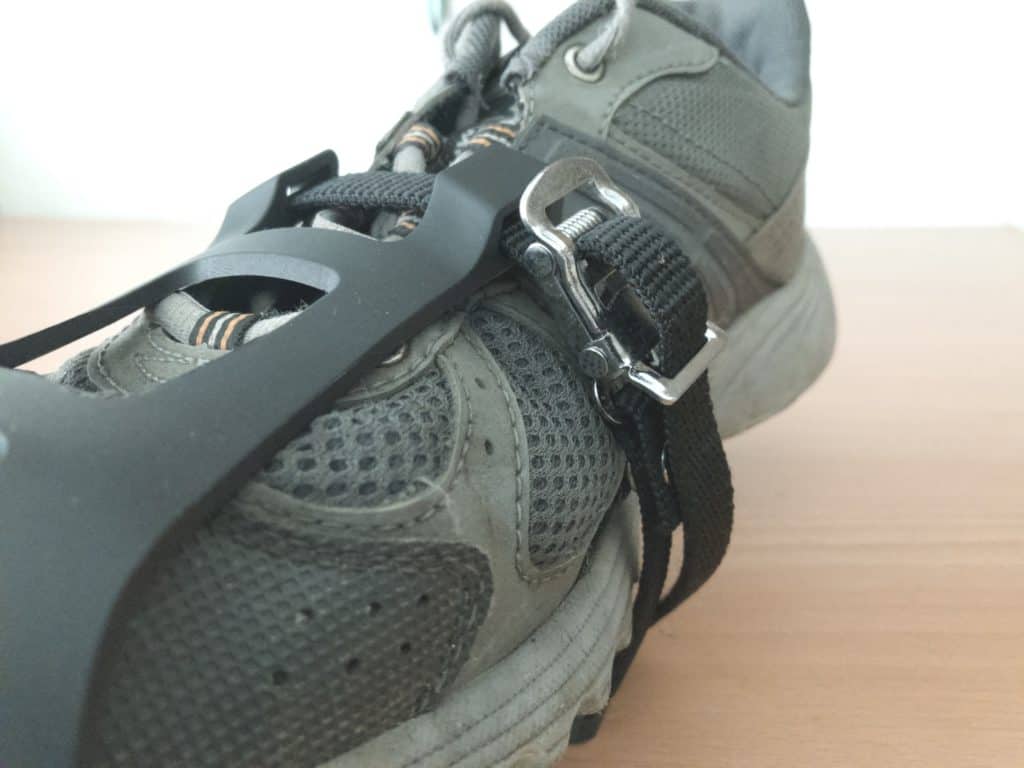
You’ll most likely be using some sort of sports shoe. The trick is to locate the strap around the slightly narrower section behind the ball-of-the-foot section, which ensures that your shoe catches the strap thus preventing your foot coming out of the toe clip cage.
HOW DO YOU FIX A TOE CLIP ON A PEDAL?
In this section we’ll cover
- how you take a toe clip frame off a toe clip pedal body
- how you put it back on
Horizontal Bolts
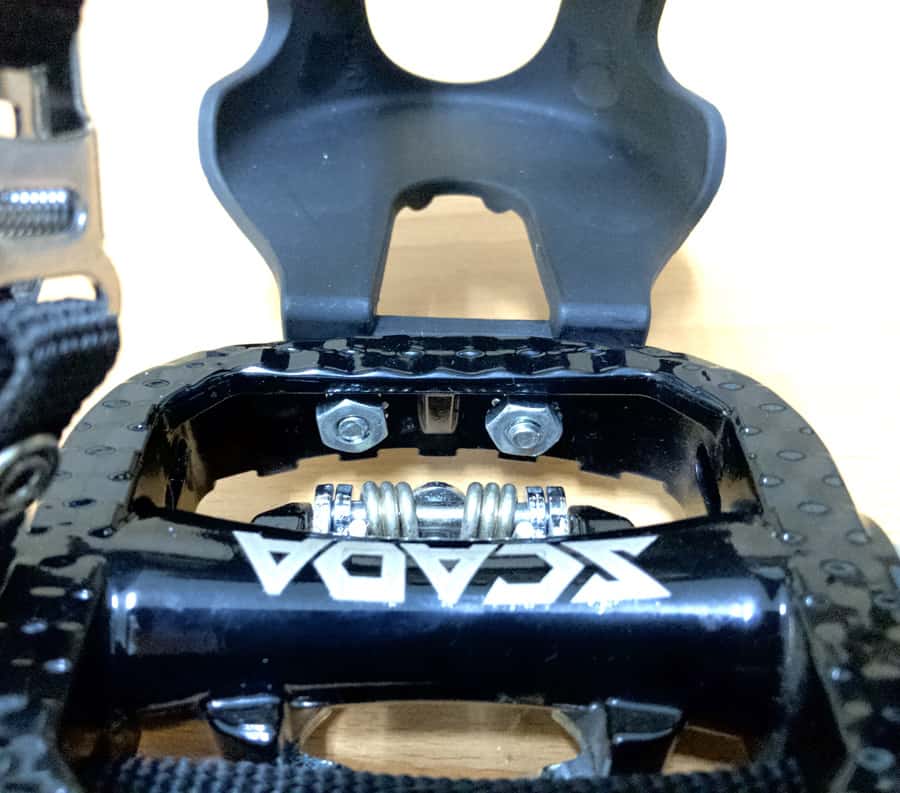
The default method for fixing a cage to a toe clip pedal is by means of bolts on the front of the pedal body.
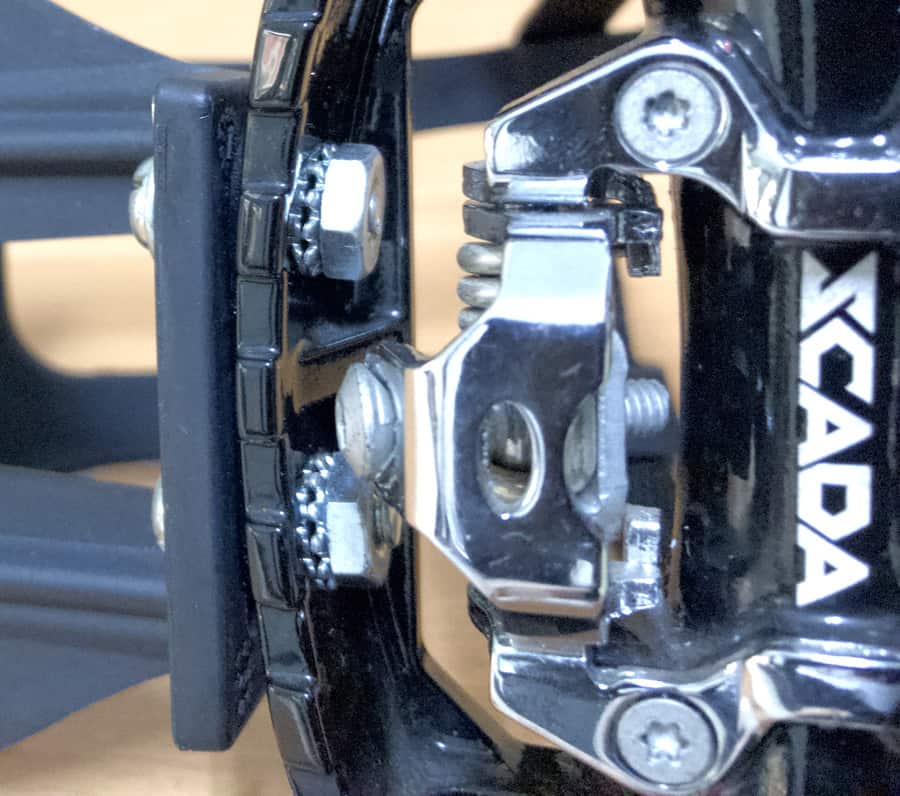
Ideally a star washer or some sort of tensioning spring washer fits between the nut and the pedal body. Otherwise continual vibration and movement will loosen at least one of them.
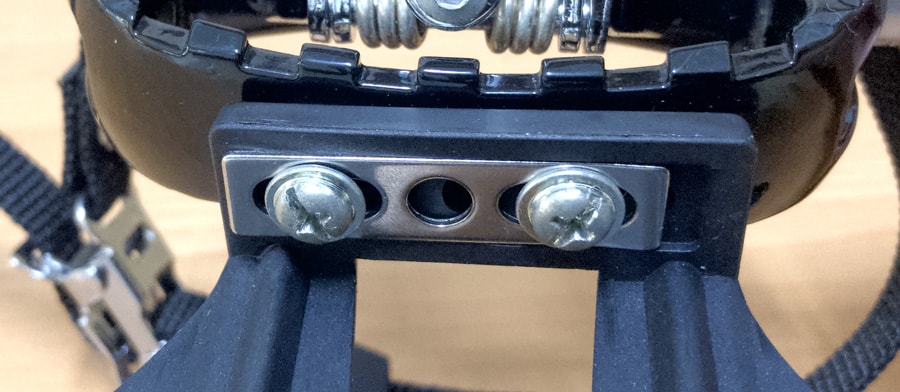
The plate between the screw heads and the cage bracket ensures uniform pressure against the bracket-to-cage connection.
Loosening or removal requires a phillips head screwdriver and a ring, or open-ended wrench.
Vertical Bolts
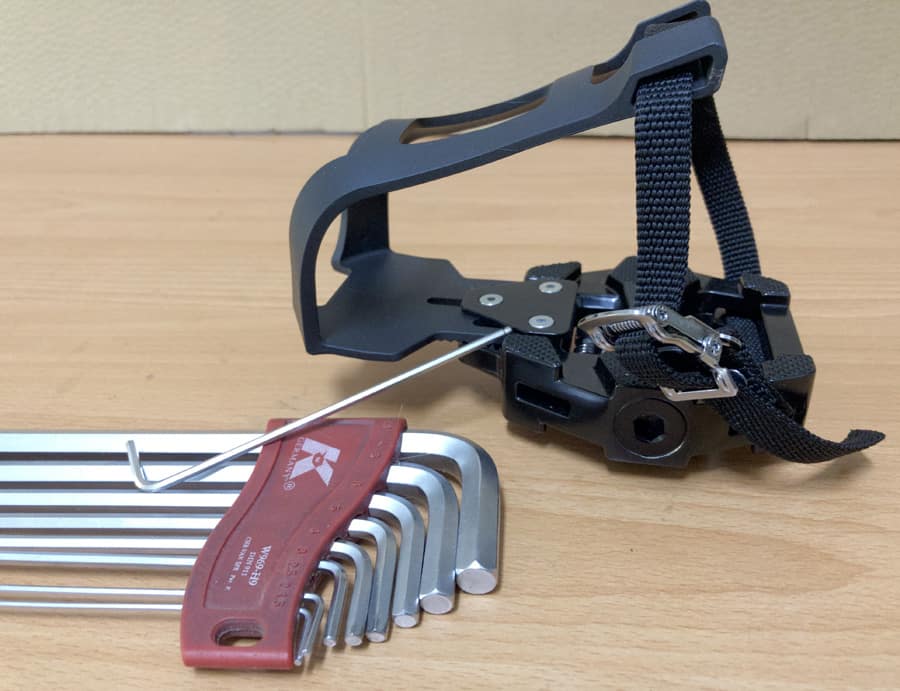
Vertical bolts attach to a plate which sits on top of the toe cage pedal cage bracket. Use a 2.5mm Allen wrench to loosen the bolts.
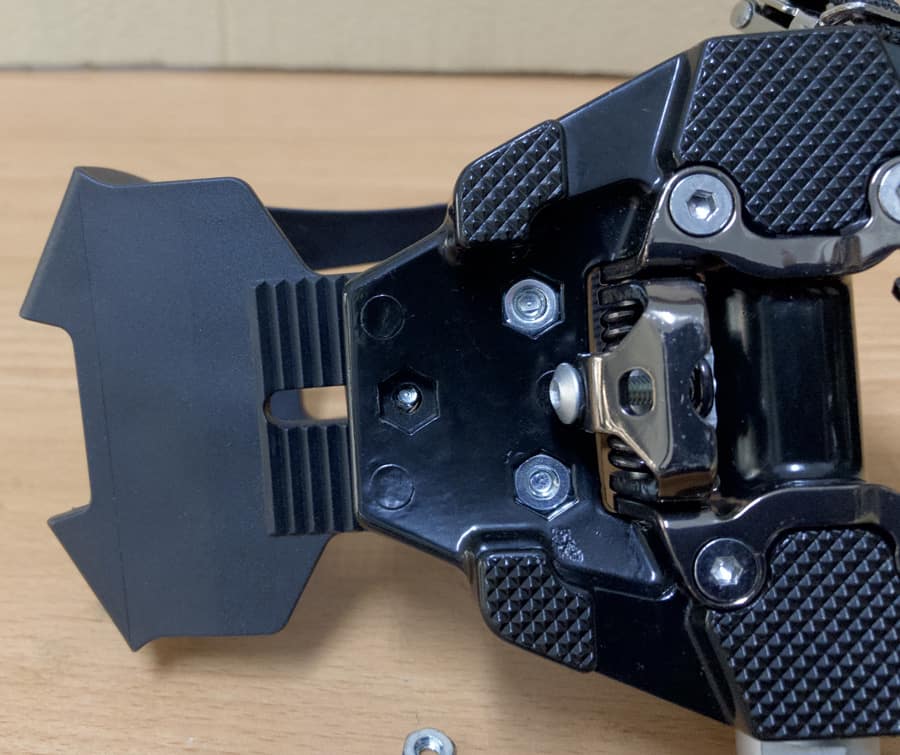
The nuts sit in a recess on the pedal body’s underside—no need for a wrench to hold them steady as you loosen the bolts.
To adjust toe cage length, loosen the bolts enough to be able to disengage the bracket teeth. Slide them to the right position. Then retighten the bolts.
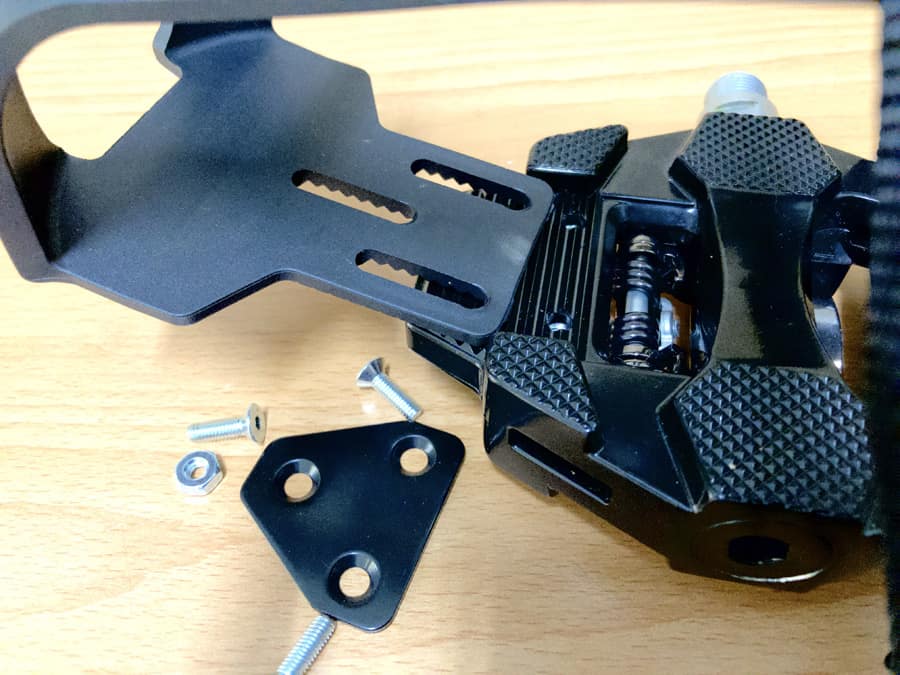
The view with the toe cage, plate and bolts completely removed.
You could use this type of pedal without the cage, as a flat or platform pedal, perhaps in a trekking context or for a more elegant look around town if you’re on a city bike. More on different toe clip pedal models below.
Remount the cage by lining the cage bracket’s teeth with the pedal body. Slot the plate on top. Slip the bolts down. Supporting the nut beneath, tighten with the Allen wrench.
DO TOE CLIP PEDALS MAKE A DIFFERENCE?
Great question asked by many people.
The answer, as with most things cycling-related, is ‘it depends’. There are some modes of cycling for which toe clips make perfect sense. Others not at all.
However, as with anything cycling, personal preference plays a huge part so it pays to do thorough research, such as consulting a bunch of resources in addition to this article.
Unfortunately—and this is true of most products these days—you usually have to try some out first to know which are right for you. That means the overall cost of new kit is higher.
The cost of finding out is measured in the products that either don’t measure up to the marketing hype, or are just not right for you.
That caveat out of the way, you’ll gain the immediate benefit of greater efficiency through your pedal stroke cycle, since you can channel your energy into the upstoke, as well as the downstroke.
SHOULD I USE TOE CLIPS ON A MOUNTAIN BIKE (or Other Bikes?)
A downhill racer’s reaction to this question: ” Whaaaaaaaa…..tttttt….??”. Or, in other words—again—it depends.
Toe clip pedals could be an option if you have been away from your MTB or are just starting out and would rather not transition straight from flat pedals.
Here’s a forum discussion on the the topic. The prevailing view is clipless pedals are better since you’ll find it simply much easier to release from them. The toe clip strap holds your foot firmly in the pedal, so if you take a bad tumble, your foot will probably be stuck in the toe cage with potentially catastrophic consequences.
Clipless pedals, on the other hand, release when a clipped-in shoe moves a prescribed number of degrees left or right.
Still, many riders report riding incident-free with toe clip pedals, despite involvement in a wide range of crash situations. If you’re used to riding with toe clip pedals, backing your foot out of the cage becomes second nature.
In recent years, flat pedals have evolved into a specialized category of their own. They provide a wide, stable and grippy surface due to the pins.
Toe Clip Pedals on Touring/Trekking Bikes
Toe clip pedals can be the perfect pedal on extended cycling journeys such as trekking or touring.
Despite cycling’s therapeutic effect on our knees, the over-emphasis on using quadricep muscles can result in weaker hamstring muscles. Weaker relative to the quadriceps, that is, due to all push and no pull.
The imbalance can lead to knee pain, which will kill your trekking tour or make it extremely unpleasant.
Adding a pull motion to the pedaling cycle strengthens hamstrings and reduces the rate of quad development at the expense of your hamstrings—knee stress is reduced, if not eliminated. A detailed discussion about that here.
TOE CLIP PEDAL EXAMPLES
In this section we’ll cover a cross-section of toe clip pedals.
Designs range from light and simple through to dual-sided or hybrid models. Each performs the basic function of keeping your foot firmly connected to the surface of the pedal as you deliver power to the drive train.
As an OEM/ODM company, we can realize almost any design a brand has in mind. As a minor reworking of one of the models we cover below, or as a brand-specific, 100% original design.
Basic Model
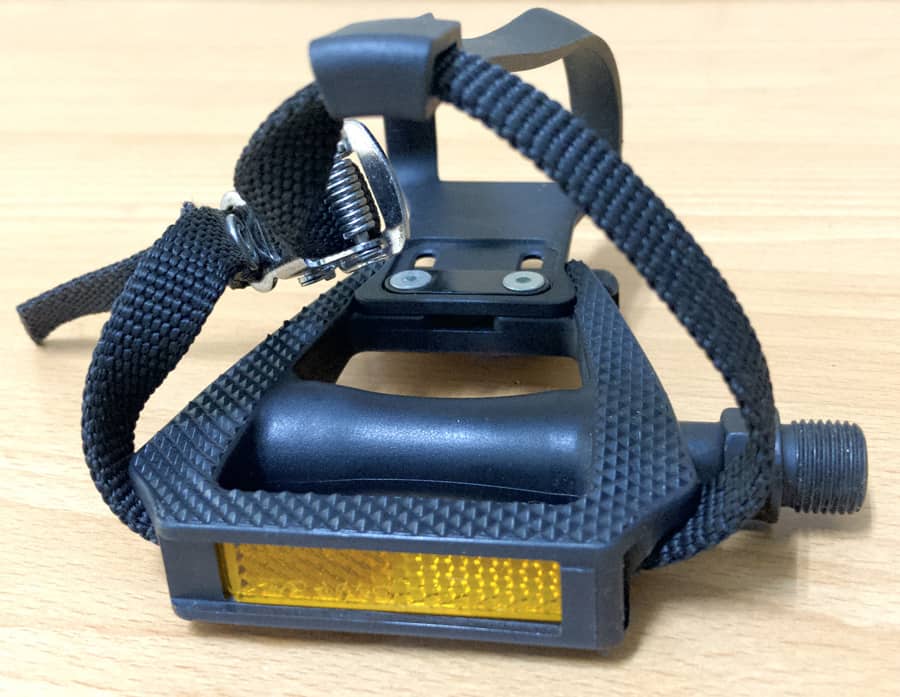
The R701B is the lightest in the range, with a reflector for low-light visibility, front and back. The sure-grip surface means you don’t need to tighten the strap all that much.
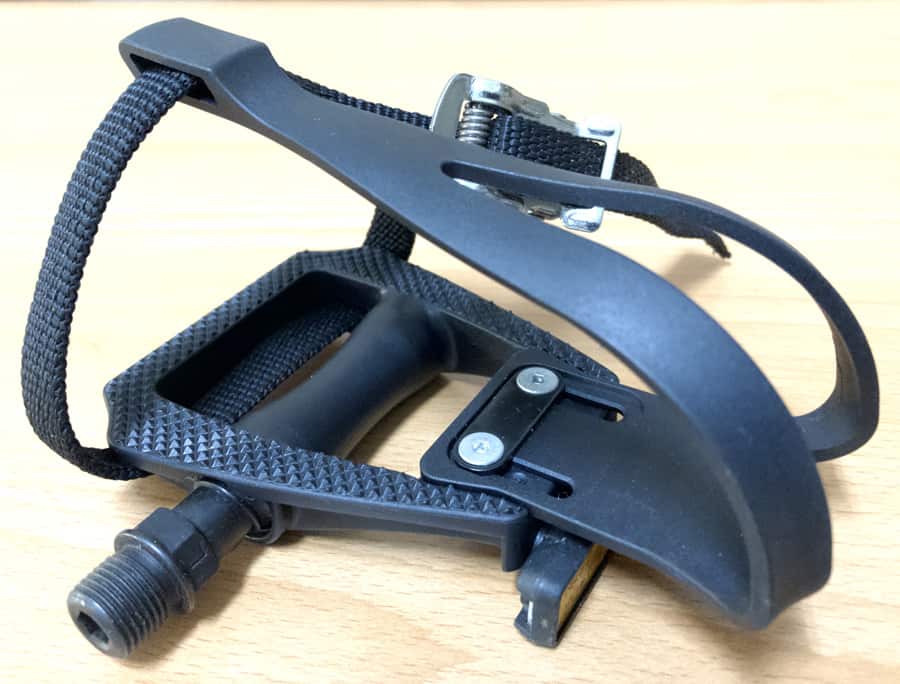
Many models, particularly the dual-sided units, are fairly heavy-duty. Not this one though. It’s a super-neat, minimalist package.
You could also use this one without the clip, and nobody would know it’s a toe clip pedal.
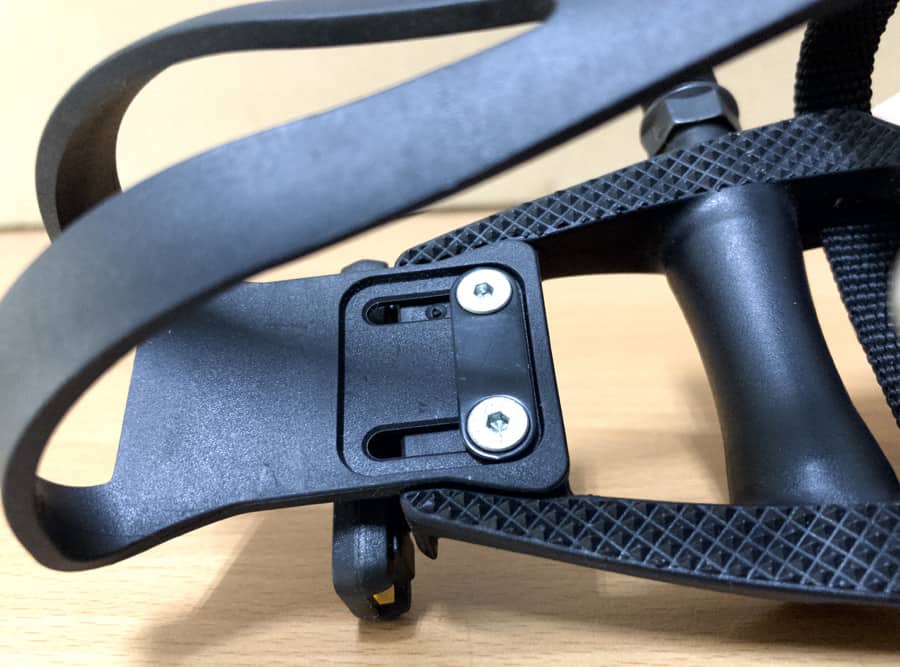
You can adjust the cage quickly by loosening the bolts and sliding to the right position. There’s no ratchet surface, so no need to loosen the bolts right off to free an upper toothed surface from a lower surface.
Style and Elegance
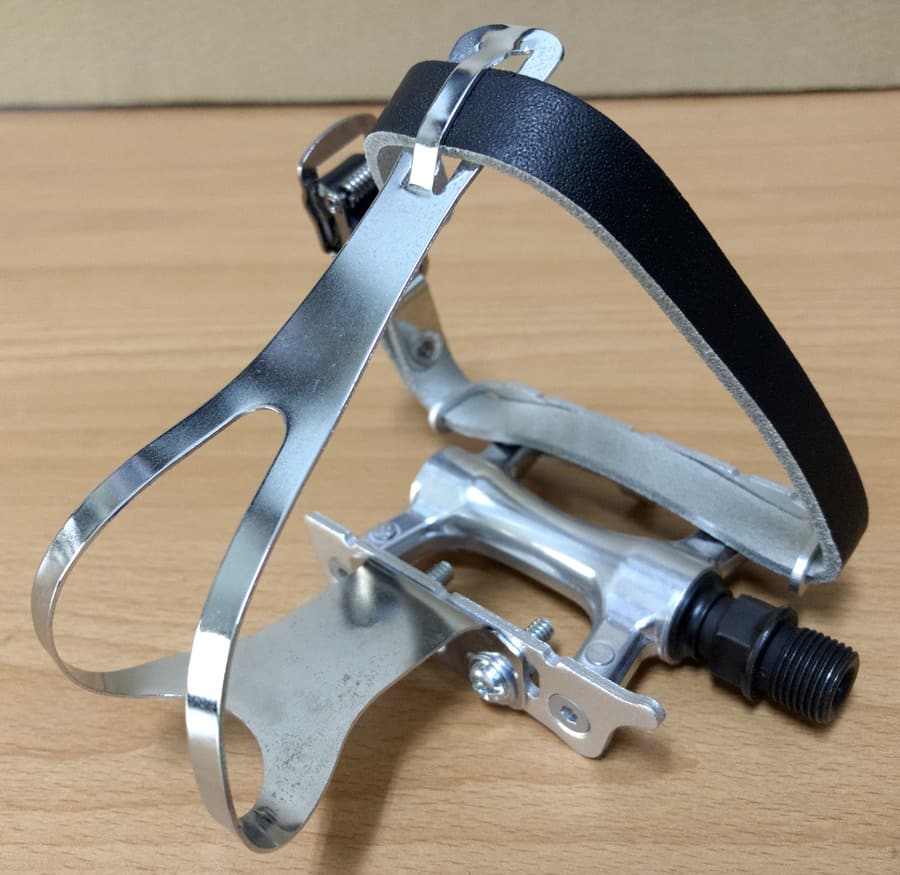
A simple pedal base with a toe clip cage that harks back to the first appearance of toe clips in the early 20th century.
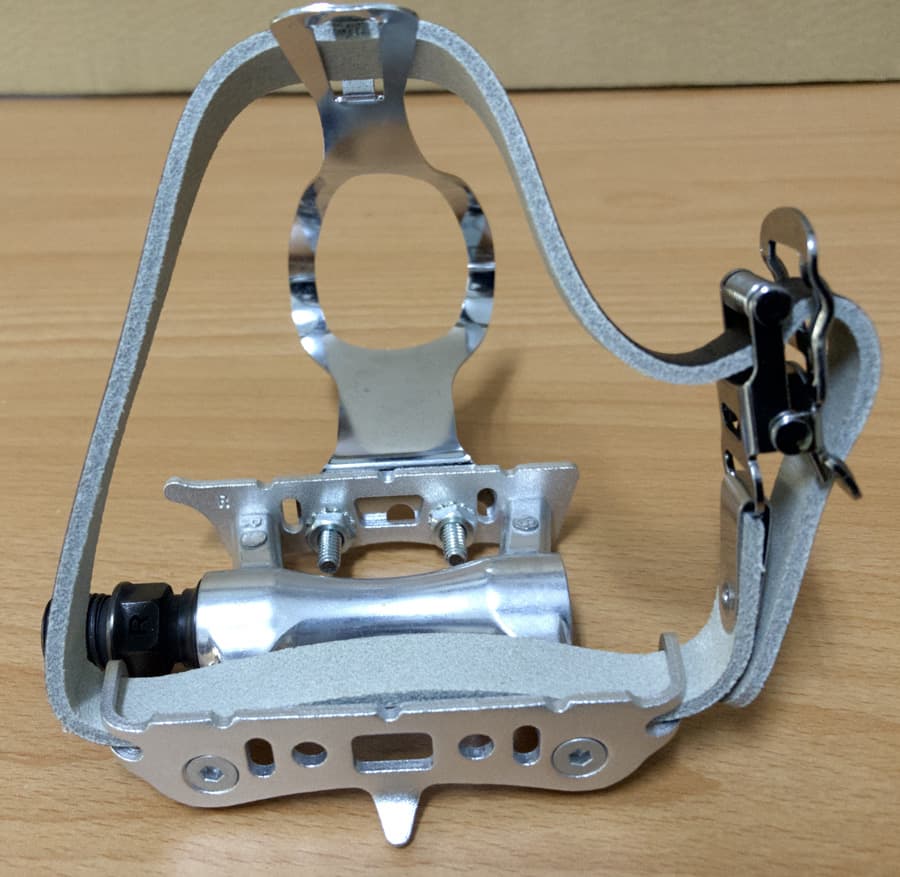
The leather strap also recalls those early days—no nylon braided straps around then, although nylon wears well and looks pretty good too (who’s really looking carefully?).
Unique – Cleat plus Toe Clip
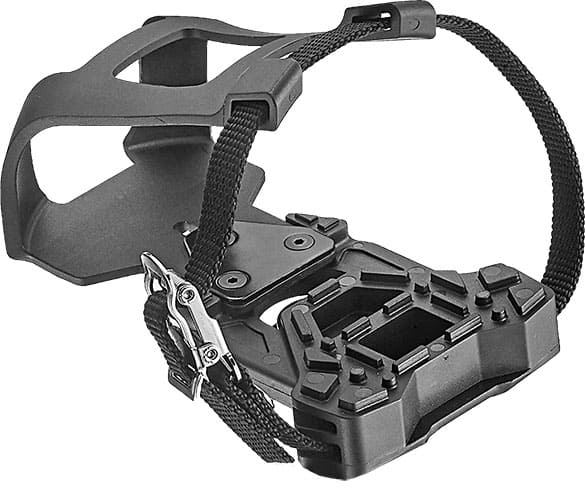
This pedal’s unique element is that it is designed to clip into a clipless or ‘SPD’ pedal via the built-in cleat. You use it in conjunction with the associated clipless pedal, allowing a choice of training with your clipless cycling shoes, or sports shoes.
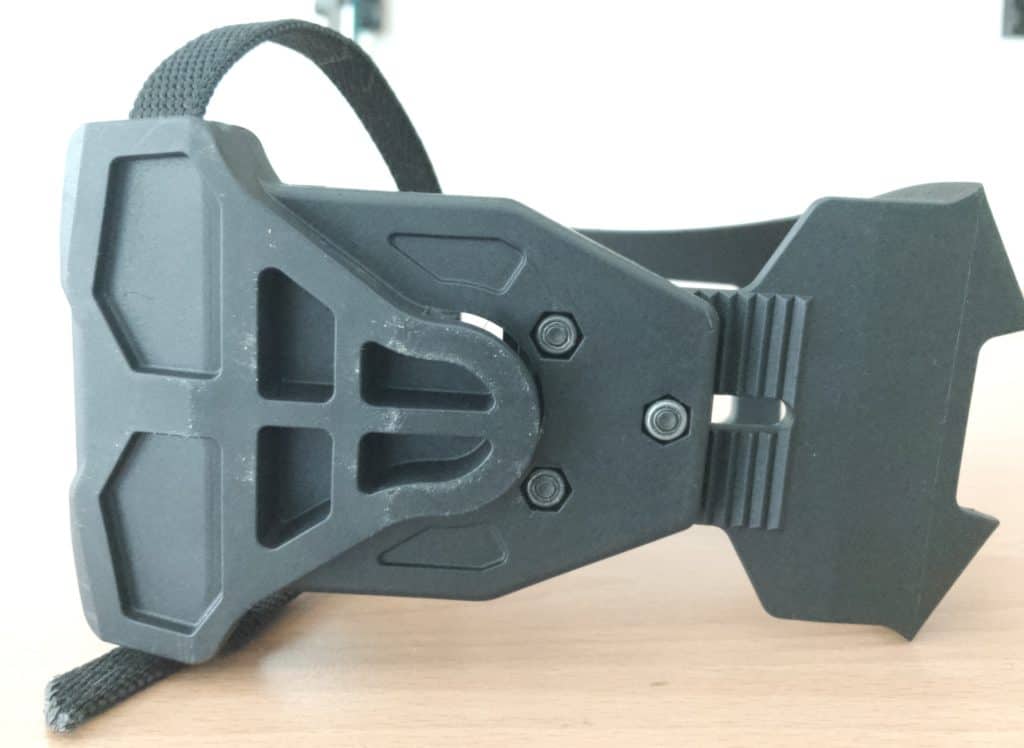
Taking a look at the cleat you’ll see a ratchet mechanism mediating the toe clip’s attachment to the pedal platform.
The ratchet allows the user to adjust the cage to their foot. Loosen the bolts, lift the ratchet teeth away from each other, then slide the cage forward or backward to fit.
Some sort of quick release mechanism here would seem to make sense. But the added complexity and potential for it to suddenly unlock, means the bolts are the way to go.
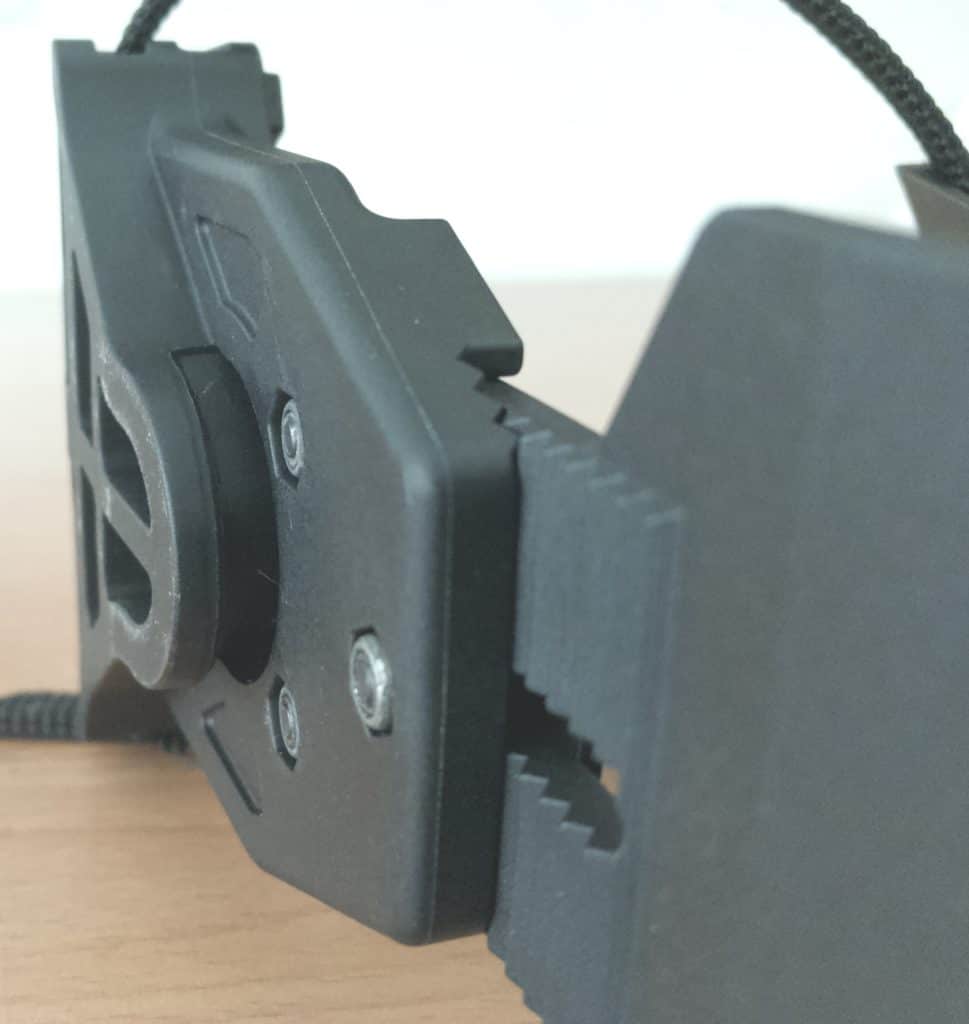
Here’s the design from another angle showing the cleat—the recess in the left of the image.
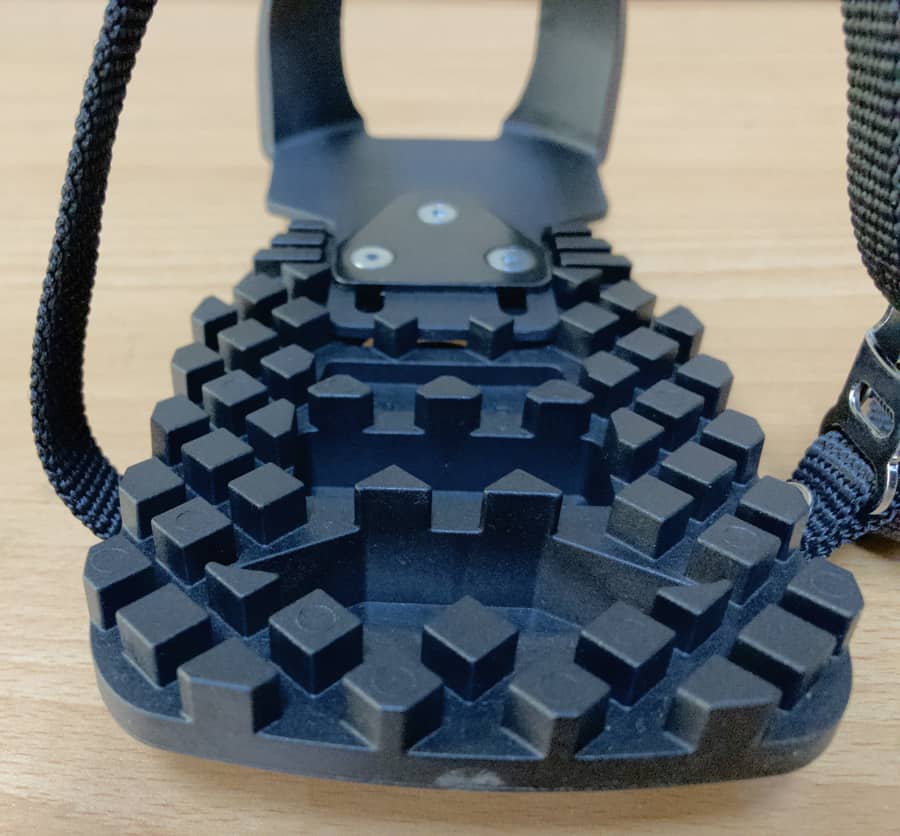
A variation on this theme provides a super-grippy surface. The straps need only be loosely fastened around the shoe.
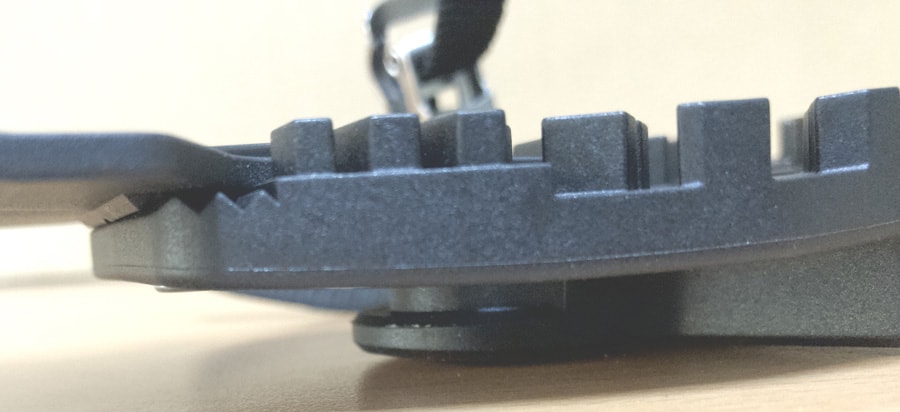
A view of the underside cleat.
You could do away with the toe cage and still be left with a grippy platform great for trekking or city biking around town.
Hybrid Pedals—Toe Clip & Dual Sided Pedals
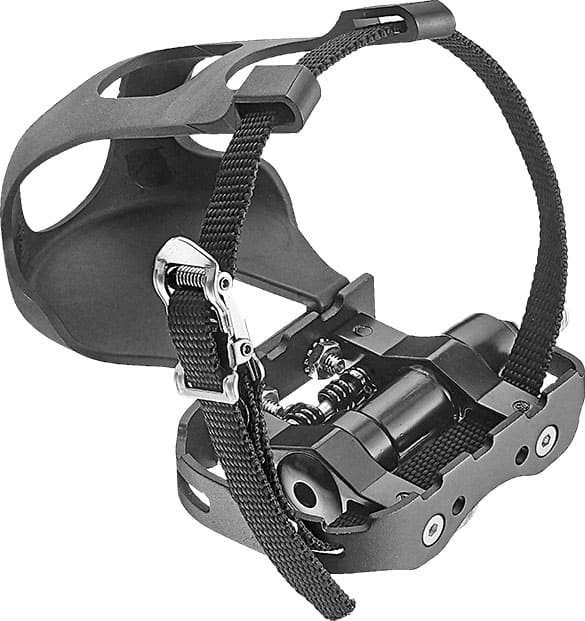
We’re making up a term here, hybrid, to describe an increasingly common pedal design combining toe clip and clipless (clip-in of course) aspects.
You’ll see and hear the term ‘dual sided’ pedals more and more in the future. It simply means this combination of clipless bracket on one side and toe clip (or flat) on the other.
For instance, one side of the S301 has a standard flat pedal design that you would be plenty familiar with. The cage bolts to the pedal body’s front. The body itself rests on a standard pedal axle; the strap threads through the rear.
Whenever you want to stop using the toe clip mechanism, you flip over the pedal exposing the cleat bracket. Clip-in with your cleat-compatible cycling shoes, simple as that.
FINAL THOUGHTS
Probably the most common—and rapidly growing—application of toe clip pedals in recent years is on stationary or exercise bikes. Dual sided pedals offer flexible options, particularly for gym owners who are then able to accommodate spinning class participants wishing to use clipless or toe clip pedals—no need to change the pedal.
You may wish to use your toe clip pedals alternately with the toe clip attached, or without, purely as platform pedals. Modern designs make that relatively painless, plus with a pedal surfaces designed to be grippy, and visually pleasing designs to boot, experimenting with toe clip pedals is easier than ever.
If you are a consumer in the market for a pair of toe clip pedals, we hope the information here has been of some assistance.
If you are a brand looking for a unique design, then get in touch with us. The form is directly below.
Thanks for reading.