A bike pedal extender solves several pedaling problems that some cyclists face.
I take a look at the problems and several bike pedal extender models to choose from.
CONTENTS
Why Use a Pedal Extender?
Physiology
Performance
Pedal Extenders & Tools
Is Weight an Issue?
WHY USE A BIKE PEDAL EXTENDER?
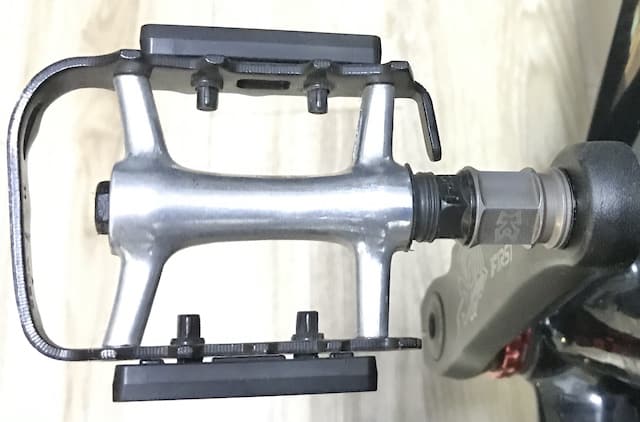
Two reasons for using one:
- fix a nagging physiological issue
- improve cycling performance
Both are completely dependent on individual preference and experimentation — what is good for one cyclist is almost certain not to be appropriate for another.
Physiology
If you have any sort knee injury, cycling’s gentle knee flexing action is recommended physiotherapy.
But you may be one of those cyclists who experiences knee discomfort even while maintaining a standard cycling action.
A standard cycling action means you are not applying a lot of force to the pedals, as you might, say, when going into a strong wind or going uphill which will amplify any existing knee problem and pain.
A steady cadence, where you feel a slight and consistent resistance in your legs, is the perfect pedaling motion.
Diagnosing the exact cause of knee pain can be tricky, and by no means take this as medical advice of any kind. However, pain may be due to your knee twisting sideways slightly, or turning outwards slightly.
In a separate category to knee injury is some sort of congenital disability; let’s have a look a common one.
Valgus and Varus
Your knee as a hinge joint that flexes and extends is not entirely stable.
Knees can be afflicted by either a valgus or varus condition.
A valgus deformity is recognizable by an angling outwards of the portion of the leg below the knee, giving a ’knock-knee’ look.
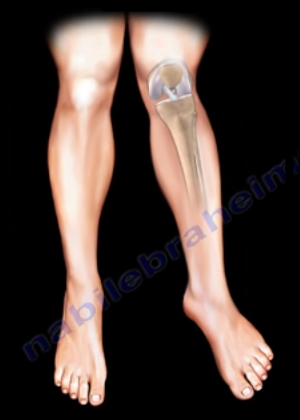
Some athletes experience a condition known as valgus collapse where the upper leg moves significantly towards the midline of the body.

A varus deformity is the opposite of valgus. The portion of the leg below the knee deviates inwards, giving a ‘bow-legged’ effect.
There was a case where one road cyclist’s left leg had a valgus problem; his right leg a varus problem.
If you were to look at him front on, both legs would slant to his left.
Thinking it may be a problem with his cleats, he added shims. When that didn’t work he experimented by adding a 20mm extender to his left pedal which solved the problem.
Knee/Pedal Alignment; Arch Deformation; Saddle Issues
Separate from any physiological valgus or varus issue is the vertical alignment of your knee with a pedal.
A commonly reported reason why legs don’t move straight up and down is due to arches falling on the downstroke.
Saddle height and width can also be a contributing factor.
If your saddle is even a tiny bit too high, your leg will fully extend at the bottom of the stroke. From the rear it would appear as if your hips were rocking from side to side.
The movement would be even more pronounced if your sit bones contact a narrow saddle right at the edges.
Make sure the angle of your knee is 90 degrees maximum at the top of your pedal stroke or even less at 80 degrees.
In the end, discomfort may simply depend on how you actually move in relation to the pedals—an issue of motion rather than anatomy or perhaps a complex combination of anatomical factors and body-in-motion.
In sum, then, a bike pedal extender can be a solution to knee pain by changing the angle of the knee relative to the pedal.
This accessory is also not so prohibitively expensive that you can’t experiment with it, even given the various lengths that are available.
Millimeters can matter a great deal in fine-tuning a bike to the unique body that will be riding it.
Performance
There are several ways a bike pedal extender enhances or improves performance besides correcting knee/pedal alignment.
An extender’s main function is to increase the length of a pedal axle, which gives you many more options for foot placement on the pedals without having to worry about
- catching your heel on the chain stay or, worse
- taking a chunk out of your ankle ‘bone’ (lateral malleolus)
One more thing—never overlook the personal dimension to cycling.
With pedal extenders so cheap and easy to obtain, you have nothing to loose by trying out various combinations. You may discover a comfort zone sweet spot, although, if you did, it’s probably because you’ve been suffering from an undiagnosed physiological problem.
And in that case it’s just as well you did.
BIKE PEDAL EXTENDER CHOICES & TOOLS
Different lengths give you a range of either physiological or performance solutions.

You could conceivably buy a whole set such as this range from KCNC, from which you can select a pair of 18mm, 23mm, or 28mm
Or even a blend of 18mm on the left and 23mm or even a 28mm extender on the right might strike the perfect balance, depending on the nature and severity of any physiological condition you wish to correct.
Tools
Before taking a detailed look at some bike pedal extender options, I have to mention tools.
Firstly, although a 6mm Allen wrench fits to the end of most pedals, there is no hexagonal cup in a bike pedal extender since the pedal screws into that space thus becoming ‘extended’.
And while a pedal wrench with 15mm jaws is the standard pedal installation and removal tool for almost all pedals, it won’t work on a bike pedal extender.
Since the bike pedal extension must also accommodate the 14mm threaded axle, only a wrench with 17mm jaws fits.

A specialized wrench such as this will do the job.
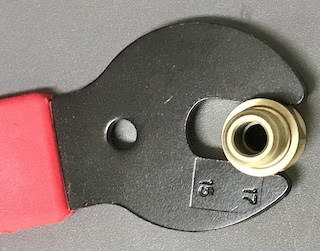
Featuring standard 15mm jaws on both ends, one end also accommodates 16mm nuts and the other, 17mm.
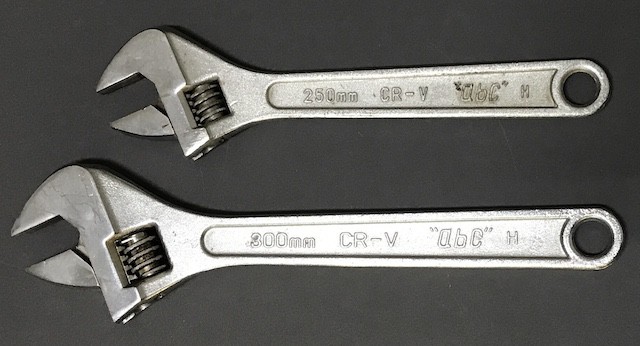
If you don’t have this type of specialized tool, then an adjustable wrench will do.
250mm is a good length to bring to the job of tightening a bike pedal extender into position. 300mm is better though.
Having said that, if all you have is a smaller wrench, then you will be able to make do with what you’ve got.
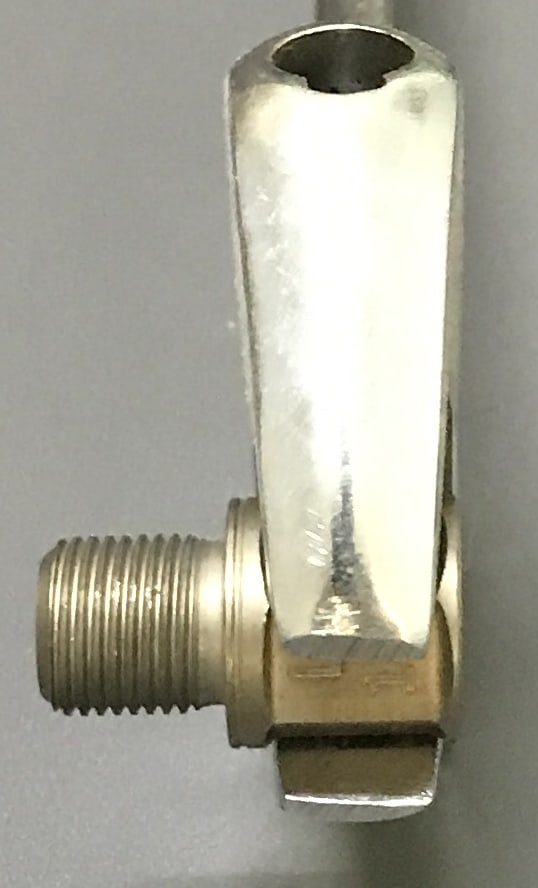
A larger adjustable wrench’s jaws fit exactly onto a bike pedal extender’s hexagon. Constrained by the flange on either side, as long as you have a snug fit to the flat, the tool is unlikely to slip off.
Bike Pedal Extenders from KCNC
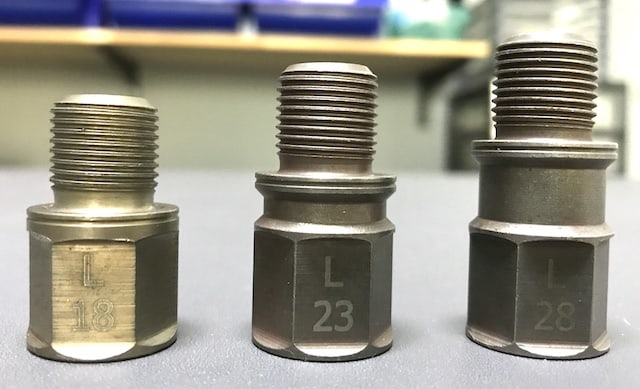
Here is KCNC’s selection of bike pedal extenders: from left to right the lengths are 18mm, 23mm, and 28mm (available online, but not direct from KCNC)
Amazon also has several branded options.
Chromoly is the main material, with titanium also an option.
Titanium is lighter, stronger, and won’t corrode, none of which is a good argument for choosing titanium; chromoly is just fine.
For our purposes here, we’ll just be focusing on KCNC’s extenders.
For illustration, I only have the left side available. But what you do to the left you do to the right, remembering, though that the left side, as with all pedals, is a left hand thread—righty loosy, lefty tighty.
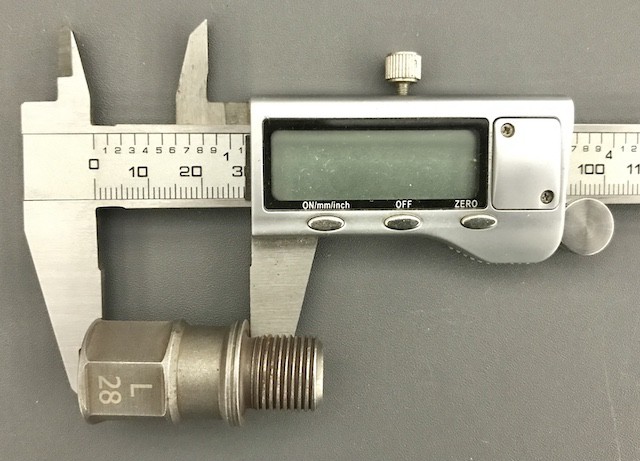
We calibrate length from the bike pedal extender’s outside edge—where the pedal screws into it—to the inside edge of the flange abutting the threads which screw into the crank.
The extender in the image above gains you an extra 28mm exactly from the crank to where you fix your pedal.
Note that using a washer adds around 1mm to the crank and around 1mm to the bike pedal extender/pedal connection.
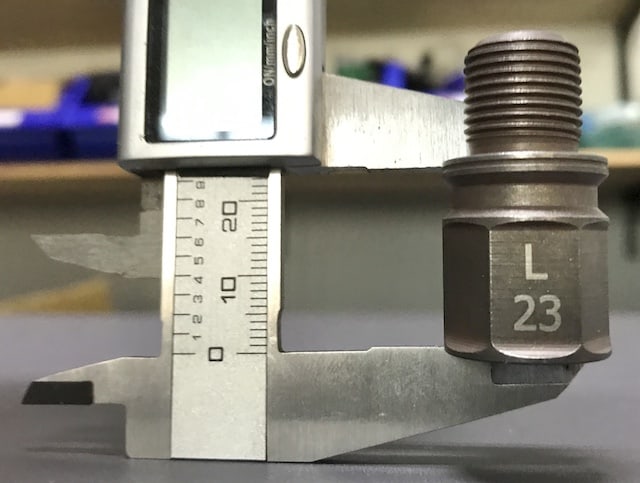
The 23mm pedal extender.
Just as with pedals, a bike pedal extender always tightens with the crank rotation direction (hence the left side is a left hand thread).
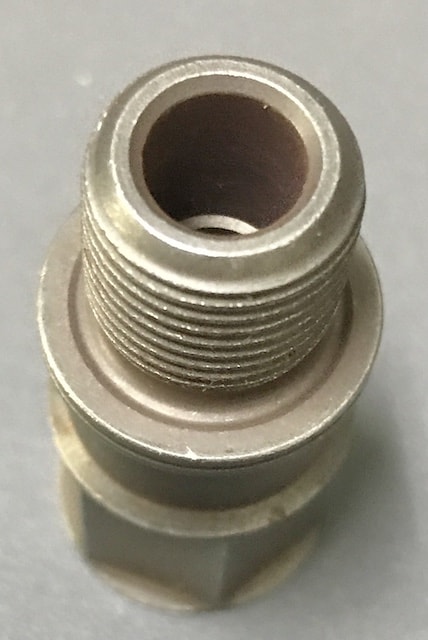
The thread that screws into the pedal. You’ll note that there is no hexagon to take a 6mm Allen wrench as with most pedals.
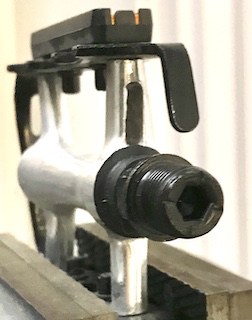
All pedals except the very low end models make it possible to fix the pedal into the crank with an Allen wrench—note the hexagonal Allen wrench socket on the pedal axle which is lacking, however, on a bike pedal extender.
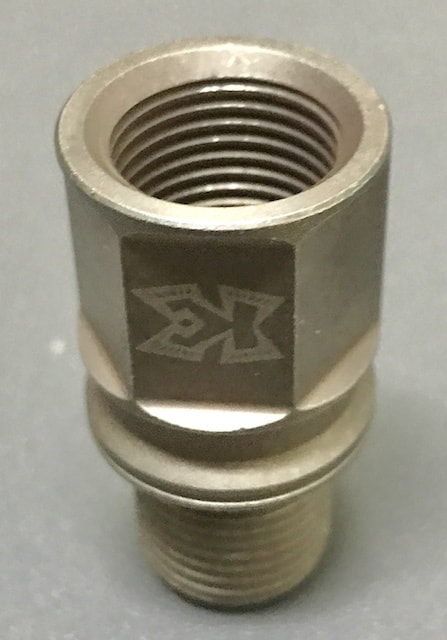
Having fixed a bike pedal extender in the crank, the pedal screws into a thread with the same 15mm calibration as the crank.
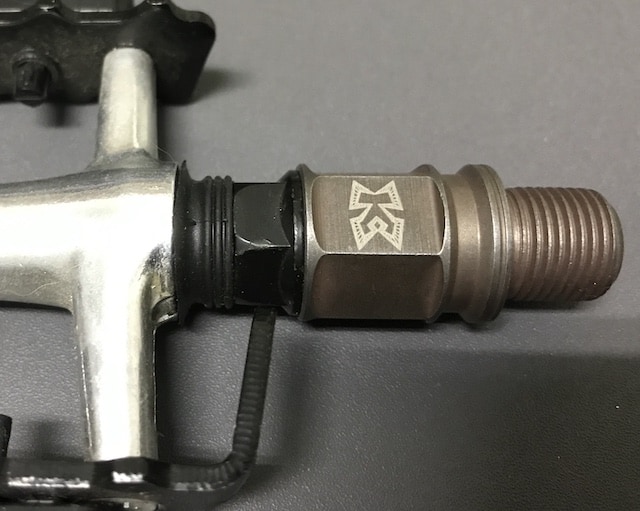
The easiest procedure is to install the extender into the crank, then install the pedal into the extender.
Oil and Washers
Applying a coat of light oil such as sewing machine oil on pedal threads, smooths installation and greatly helps with removal by reducing the possibility of pedal/crank threads rusting together.
Some mechanics prefer a light coat of grease which is also fine.
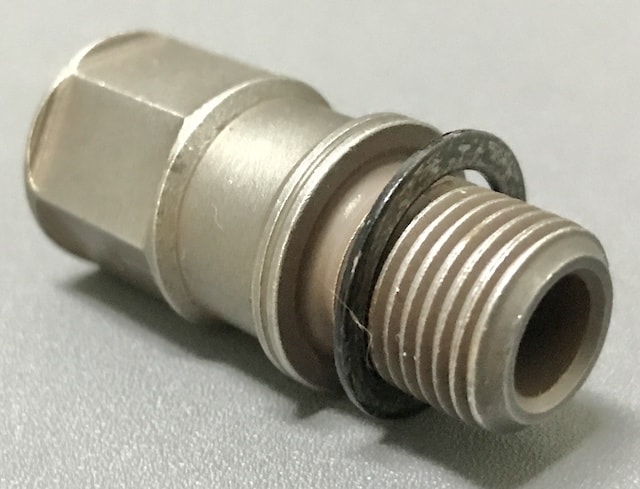
Pedal washers cushion the pedal and crank connection making it much easier to tighten a pedal to the correct torque.

You’ll feel the difference: a certain ‘sponginess’ when using a washer, whereas without the hard edge of the pedal locks against the crank; pedals come loose more easily but are also harder to tighten.
Consider doubling up on washers for both bike pedal extender and pedal.
SHOULD YOU WORRY ABOUT A BIKE PEDAL EXTENDER’S WEIGHT?
Firstly, if you’re on an e-bike, don’t even think about how much weight extenders will add.
With e-bikes, weight is irrelevant.
Too many cyclists from newbies to cyclists who, while not professional racers, fret over tiny weight advantages of a few grams here and there.
The argument is that extra weight means higher energy output to overcome the weight disadvantage. But you’re already on the heaviest bike you’ll probably ever own due to the mid/hub drive, battery pack(s) and generally beefed up frame.
On a conventional bike, the potential comfort gain from a bike pedal extender far exceeds any disadvantage from the extra weight.
For the KCNC bike pedal extender models illustrated above the weights are as follows:
18mm: 27g x 2 = 54g
23mm : 32g x 2 = 62g
28mm : 35g x 2 = 70g
If, in the end, you are truly worried about weight, then get yourself a titanium bike pedal extender set.
FINAL COMMENTS
Fitting a bike pedal extender set is an option for a small minority of cyclists.
If physiological issues are causing pedaling discomfort, a pair of bike pedal extenders is probably the solution you need.
If you are looking for performance enhancement, pedal extenders will not be the first thing on your list.
But, they’re cheap and just the ticket for cyclists looking for flexibility in foot placement on the pedals.